

Bucket Drumming Basics: The Complete Beginner’s Guide
Never taught bucket drumming before? You’re in exactly the right place.
Whether you’re a music specialist looking for a structured starting point, or a classroom teacher who’s heard that bucket drumming is BRILLIANT for upper primary students and wants to find out if that’s actually true — this guide has you covered.
Here’s what we’ll walk through together:
- The 3 core sounds and how to teach them (even without a music background)
- How to hold the sticks correctly — and how to explain it to kids in seconds
- 5 beginner patterns that build from dead simple to genuinely impressive
- A complete first lesson framework you can pick up and use straight away
- The most common beginner challenges — and exactly how to solve them
If you’d like to go deeper on what bucket drumming is, why it works, and what age groups it suits best, our complete guide to bucket drumming covers all of that first.
Before Your First Lesson: What You Actually Need
Good news: bucket drumming is one of the most affordable instrument programs you can run. Here’s your quick checklist before you start.
Equipment Checklist
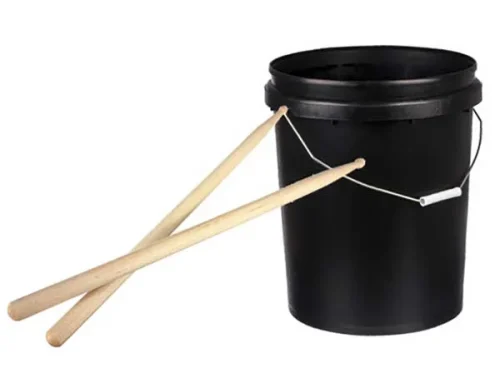
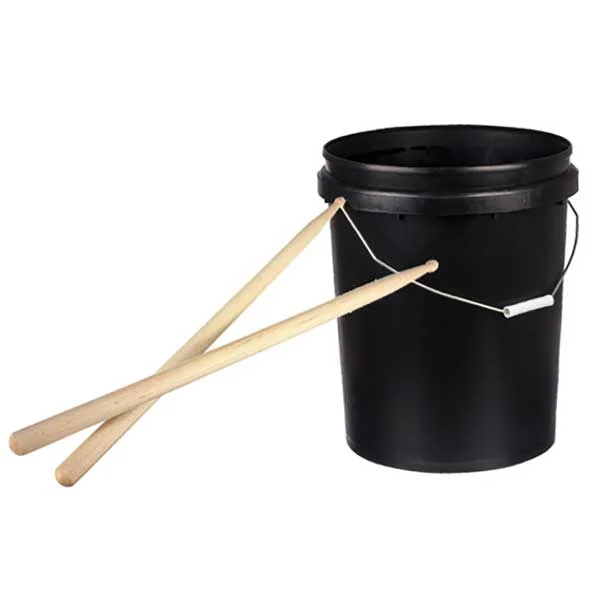
- Plastic buckets (one per student) — large size heavy duty hardware store buckets work perfectly. See our guide to the best buckets for bucket drumming if you want specific brand and size recommendations. If the buckets have metal handles, remove them before the lesson. They are not needed and rattle.
- Drumsticks . The best choice is to get the cheapest possible actual drum sticks from a music store. It is possible to use wooden dowels from a hardware store, but they can break easily and cause splinters, so we advise real drum sticks if the budget allows.
- A clear, open space, ideally with carpet if possible. Carpet will dampen the sound of the buckets a little, and stop the buckets moving around too much.
Classroom Setup
How you arrange the room makes a big difference to how the bucket drumming will work in your classroom.
Here are a few tips that work well:
1. Dedicated Performance Space. If you have space, have a dedicated ‘bucket performance area’ where students will go to to play the buckets, and then move physically away from during other parts of the lesson. This is critical, as students will not be able to resist making noise with their sticks and buckets if they are asked to sit behind them being quiet for an extended period of time.
2. One Bucket in front of one chair. In the bucket performance area, have the buckets set up in front of chairs, with their open end on the floor. Set them up in a semicircle of one or two rows, so that everyone can see the classroom screen. If possible, always set buckets and chairs up for students where you want them to be in advance.
3. Control the Stick Distribution. Place the sticks in a dedicated ‘stick bucket’ where you will hand them out from, and collect them in at the end of the lesson.
4. Have an idea where sticks will be placed. Don’t set them in advance, as students need to take responsibility for this, but you need to know exactly where sticks will be placed down after each use. It may depend on the type of chairs you have, and whether you have carpet. On the floor in front of the bucket or to the side works if you have carpet. On the chair works if they are the type of chairs where the sticks won’t roll off.
4. Establish Clear Expectations. Establish your classroom rules and routines BEFORE you hand out sticks. This is crucial for a successful bucket drumming lesson. More on this below.
Bucket Drumming Performance Space
This diagram shows one possible setup, with a dedicated performance space for the buckets, and a space on the floor. Its important for everyone to see the classroom screen from both areas.

The Most Important Thing You Can Do Before Playing:
Establish Essential Bucket Drumming Rules and Routines for Beginners
This is non-negotiable. Bucket drumming is loud, students get excited, and without clear, consistent routines and expectations, you will lose control quickly.
The Rules
Rule #1: Play only when playing together.
This is the most important expectation to set up. If students are randomly practising, hitting their buckets when you are trying to give instructions, it will quickly get out of hand.
Students have to understand that the ONLY time they play, is when the group is playing together. When the music is on, when the screen is playing, and when the animation says to play, they play. When it does not, there should be no sound.
This is like a computer game, if they play at the wrong time, they are out!
Explain to the students that its like they are in an orchestra. You don’t see people in an orchestra or band on a stage playing randomly. When they play, they play together.
Rule #2: Break Rule #1 and you lose your sticks.
It is important, from the very first lesson to have ZERO tolerance for breaking rule #1. The consequence needs to be “you will lose your sticks” .. and then the students have to suffer the indignity of having to mime with their hands in the air while all the other students are playing. They won’t want that! That is why we explain this so carefully FIRST, before touching the sticks or going anywhere near the buckets.
The Routines
Key routine #1: learn at the floor, play at the buckets
As I wrote above in the setup section, ideally you should have a large enough room to have two separate spaces for bucket drumming.
- The floor. An area where students can sit on the floor, where they can see the screen.
- The buckets. The buckets setup in a dedicated area with chairs
ALL the instruction, ALL the learning takes place with students sitting on the floor. They practice miming the patterns first. Working out which hand plays the notes in the centre, and which hand will play the rim notes. They listen to the speed of the music, and mime in time.
Only when you are satisfied that the students understand the activity precisely, THEN you can move to the buckets to have a go.
Key routine #2: Move silently, no instruction at the buckets
Establish a routine that students need to move SILENTLY to the buckets, pick up their sticks and play.
You will need to practice this several times. The first time, BEFORE you hand out sticks.
Of course you need to firstly make sure that you have the right number of chairs and buckets for your number of students, and make sure they know where they will be seated at the buckets. Once you’ve done that, you’re ready to practise moving to the buckets.
Say something like:
“We’re a well drilled, high class performance team. We have to be able to move to the buckets quickly and quietly, without making a sound. The faster we can do this, the more bucket drumming we’ll get to do. In a minute, I’m going to start counting, and then we’ll see how quietly and efficiently we can move to the buckets.”
Then have them practise, without making a sound. Once they’ve done that, have them move back to the floor.
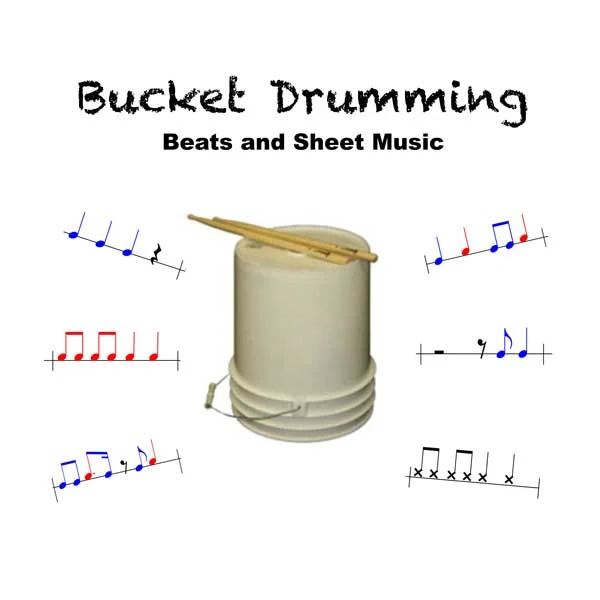
The 3 Basic Sounds (Learn These First)
Before any patterns, before any rhythms — students need to know how to make three distinct sounds.
These are the building blocks of everything that comes after.
In the Fun Music Company program, we use a simple colour-coded notation system to make these instantly readable. Here’s how they work:

Centre — Bass Sound
Strike the centre of the bucket with one stick. This produces the lowest, deepest sound — your bass note. Think of it as the foundation of the beat.

Rim — High Sound
Strike the rim (edge) of the bucket. This produces a higher, sharper crack. Strike with the shoulder of the stick over the raised plastic edge of the bucket.

Sticks — Click Sound
Click the shoulders of the two sticks together in front of you (not on the bucket). This produces a dry, mid-range click and adds rhythmic variety without any bucket contact.
Common Sound Mistakes and How to Fix Them
1. Too Loud. The most common problem! Hitting a bucket with a wooden stick will be loud, and it needs to be controlled. Particularly the bass sound in the centre will be very loud if it is not controlled. The single best way to control this is simply having the students control their volume with the concept of stick height, and we speak about doing that in detail later in this article. There are also various ways of making the drums physically quieter:
a. placing foam or rubber pads on top.
b. rubber tips on sticks.
c. Cloth tape on top
2. Rim sounds too quiet. This is usually because the rim is not being hit with the right part of the stick. The rim needs to be struck with the shoulder of the stick, not the tip. If they try and hit with the tip, they will get a very thin sound, and often miss.
3. Playing is too tense. This is when students play really tightly and tensely, and might even break the bucket if they keep playing this way. This is normally a grip problem, where they are holding the sticks so tight that the sticks cannot bounce from the bucket. See the section below on holding the sticks for bucket drumming to resolve this issue.
Holding the Sticks: Matched Grip
For beginners (and for bucket drumming generally), matched grip is all you need. Both hands hold the stick the same way — simple, consistent, and easy to teach.
How to Teach It
- Hold the stick about one-third of the way from the bottom end — not at the very end, not at the very top.
- Hold the stick between your thumb and your index finger. This makes the pivot point, which is called the fulcrum. The other three fingers wrap loosely around.
- Palm faces down, thumb to the side. The thumb should not be on top.
- Bounce the stick on the surface — it should rebound naturally. If it doesn’t, the grip is too tight.

Kid-Friendly Cues That Actually Work
1. Imagine a bolt going through your thumb, through the middle of the stick, and then into your index finger on the other side. Everything rotates around this bolt.
2. Make a thumbs up sign, then press the pad of your thumb into the middle joint of your index finger. Then put the stick in there, between the pad of your thumb and the middle joint of the index finger.
2. Your stick should bounce like a basketball — it wants to come back up.
Your First 5 Patterns
These five patterns are carefully sequenced — each one builds on the last. Start at Pattern 1 with every class, regardless of age or perceived ability. Students who grasp it quickly will feel great. Students who need more time won’t feel lost.
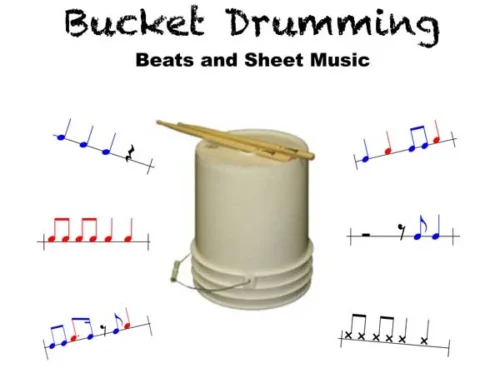
About the notation: You’ll see each pattern written in standard music notation, colour-coded for clarity (blue = Centre, red = Rim). Music specialists will appreciate the precision; non-specialists, don’t let this intimidate you — the colour tells you which sound, and the spacing tells you when to play. In the Fun Music Company program, these patterns are animated with moving visuals that make the timing crystal clear.
Pattern 1: Steady Beat
4 steady centre hits, then 4 steady rim hits. This is your foundation — establishing the beat and getting students comfortable with the two main sounds. Keep the stick heights under control, count it aloud, and play in time with the animation.

Why This Animation Matters
Notice how the animation shows exactly when to play, which hand to use, and keeps the tempo consistent? This is what makes bucket drumming work in real classrooms — students aren’t guessing, and you’re not constantly demonstrating.
Patterns 2–5 below show you the progression, and you can absolutely teach them from the notation — or access the full animated versions with backing tracks in the Bucket Drumming Program.
Pattern 2: Three notes, one rest
Two centre hits, a rim hit and a REST. The rest is important, and it builds on the concept that beat flows through music, whether there is a sound or silence on it. This is the first pattern that creates a real rhythmic feel — students will start to “hear” the groove. Focus on keeping the beat steady, and not rushing.

Pattern 3: Stick Clicks
Two centre hits, two stick clicks. This helps them learn to control their stick heights for the centre hits, and create an even sound with their stick clicks. Again, speeding up will be the key problem. Every class will get faster and faster, and that is why lots of work on steady beats like this is very important, and following animations and backing tracks is critical.

Pattern 4: Three Sounds
Here students will play two centre notes, a rim note and a stick click. This pattern requires a bit more co-ordination and makes them concentrate, while still keeping the beat steady.

Pattern 5: 8 beat sequence
This pattern starts to become more musical, and combines centre and rim notes with a stick click at the end. As with just about every pattern above, your main issue with this will be students getting faster. It happens in every group. The only solution for this is continued, consistent practice. Playing with backing tracks and animations is critical, as it gives external focus to allow them to focus on the steady beat.

Your First Lesson Plan Framework
This is a simple framework for your first bucket drumming lesson. The goal here is not to create amazing musicians, or a polished performance. Your goal here is to have the students leave with a positive experience playing music with bucket drumming.
You will notice that a lot of the lesson is focused on classroom management and establishing routines. This is critical, as you don’t always get a second chance to do a first lesson! As students become used to the routines and expectations, you will be able to achieve a lot more music playing in the lessons. This becomes the incentive to behave, and experience the joy and excitement of bucket drumming together as a group.
| Activity | Description | |
|---|---|---|
| Activity 1 | Welcome and Discussion | Here the discussion needs to cover:
|
| Activity 2 | Moving to buckets and back to floor | Before handing out sticks, make sure you have the right number of buckets and chairs set up, and that students know where they will go to to play. They need to be able to move there quickly, and silently. Get them organized at the buckets, then have them come back to the floor. Practise this several times and practise doing it quickly and quietly. Remember, there should be NO sticks present on the floor or around the buckets at this time. |
| Activity 3 | Holding the sticks | With the students sitting on the floor, demonstrate the grip in one hand, and talk about the importance of holding the sticks properly. Without holding sticks properly the sound will be tense and uneven, and you could even break the buckets or give yourself an injury. Then, give each student ONE stick, and have them try the fulcrum grip in each hand, one at a time. Only when you’ve seen that each student can demonstrate that they can hold their stick correctly in both of their hands give them the second stick. |
| Activity 4 | Sticks down! | Now that students are holding a pair of sticks, now it is time to practice putting them down and picking them up. This may depend on how much space you have, but practice holding both sticks together in the right hand, and placing them on the floor as a pair. This is best done with non-verbal action from you, the teacher. Do a big, deliberate action. Put both sticks together, place them gently down as a pair on the floor. Then have all students copy that action. Then practice picking up and putting down as a class in that slow, deliberate, SILENT manner. This is critical, as this will be how they begin all exercises and pieces at the buckets. |
| Activity 5 | Move to the buckets, place the sticks | Here, students will take their sticks to the buckets, but NOT PLAY ANYTHING. You will give them this instruction: “In a minute, when I begin counting to 10, we are going to take our sticks to the buckets, but we’re not going to play anything just yet. We need to do this silently. When you’re all in position at the buckets, I’ll stop counting, and give the sticks down signal, and you need to place the sticks down directly behind your bucket, like this. I’m going to see what score you can get for this, and see if you can be my best class!” You need to use your own language style of course, but keeping it positive and happy while simultaneously establishing the importance of discipline in these classes is critical. Once they have placed their sticks behind their buckets, have them leave them there and come back to the floor. |
| Activity 6 | Learning the first beat at the floor | Now they have their sticks at the buckets and they know where they will go to play, you can begin to think about a pattern to play. Here is where they learn about centre notes and rim notes, and how the animation works. Then, have the students mime the playing, while watching the animation on the screen. It might seem too easy, but it is very important. Only when you can see that the students are concentrating, can understand what they have to do will you move to the next step of playing on the buckets. |
| Activity 7 | First time playing the buckets | Then you may give an instruction like “OK, class you’re doing great! Now, I really want all of you to have a great success playing this on the buckets for the very first time. But, in order for this to work, we need have to have NO sound, except for when we’re all playing together. That includes talking, stick sounds or hitting the bucket. So, if we have anyone hit a bucket before we’ve started, we’ll all have to come and sit back down. Do you all understand?” Instructions like this are critical, and you have to follow through on the threat. They’ll test it. If one child hits a bucket, have the WHOLE CLASS come back to the floor and sit down. This kind of whole class discipline is better than the “take sticks away” at first. Then, once the majority of the class is behaving, if one student is still consistently disrupting, then you can use the “take sticks away” consequence. So move to the buckets silently (counting in a quiet voice, if that works for you), do the picking up sticks together action, start the animation and play as a class. There should be NO instruction at the buckets. All teaching and conversation occurs on the floor, nothing at the buckets. This gives minimum time with students with sticks in their hands that they could misbehave. Once the animation finishes, give the “sticks down” action, and have them return to the floor. There should be little, if anything spoken while students are at the buckets. |
| Activity 8 | Reflection and refinement | When the students return to the floor, have them reflect on what happened. “What did you notice about what happened there?” This will lead to effective learning as students are able to notice for themselves what needs to be refined, and what they need to make it better.
Most likely, one or both of these things happened: 1. They got faster and got out of time. Solutions to both these issues are below. We highly recommend focusing on one issue at a time. So, choose the one which you feel is most important for this class and discuss the solution. Once you’ve discussed the issues, and rehearsed again with miming, you can have another go at the buckets. |
| Activity 9 | Second attempt playing the buckets | Once they are ready, you can give them another go at playing the buckets. Make sure you keep the discipline routine. Make it into a game! “Hey, you guys scored a 9 last time we moved to the buckets. Lets see if you can make it a 10 this time – I really want you to be my best class! We can only be the best at playing the buckets if we can move there quickly and quietly, that way we get the most playing time in these lessons.” This kind of language is critical. Students will self-discipline and stop their friends misbehaving if they think they’ll all miss out. |
| Activity 10+ | More reflection and refinement, move onto next skills, and or next beats | This lesson can continue in this manner for as long as needed:
Learn a skill at the floor >> Practice on the buckets >> Reflect and refine, onto the next skill or pattern. Most likely, in your first attempts at doing this lesson, you will only get up to the first pattern, and that is OK. As you get better at managing the classes, and enrolling the students in the activity, then you’ll find that you get through a lot more in each lesson. |
Once your first lesson is done, your next step is finding beats to build on. The Bucket Drumming Beats Library has free sheet music and audio tracks sequenced from beginner to more advanced — everything you need to keep the momentum going.
Common Bucket Drumming Challenges for Beginners (and Solutions)
Students are playing too loud.
This will happen. Students are excited, will really want to hear themselves play, and if they don’t learn to control it will play so loud it will make your ears hurt and the sound coming out of your classroom will disturb other classes!
The key to volume control in all drumming is stick height. There is a direct, scientific connection between the distance that the stick moves to strke the bucket and the volume that is created. The higher the sticks are raised from the bucket, the louder the sound. The smaller the distance, the softer the sound.
Students can visualise a distance. Instruct them to visualise a line above their bucket of the distance you specify, and the sticks should not move higher than that line.
For beginner bucket drumming. we suggest a stick height of approximately 30cm, 12 inches, or one foot.
This is the absolute maximum that a stick should strike from. You need to demonstrate this to students and get them to understand that lifting sticks higher than this distance is going to result in a very loud, uncontrolled sound.
Students also need to understand that with higher stick heights comes a lack of control. If the stick heights are controlled, then they’ll be able to play all the fast and complex patterns that they will be playing later. If they don’t control it, they’ll never get there!
You may wish to try specifying a smaller height, like 15cm or 6 inches. That can work also – however be consistent and at this beginner bucket drumming stage don’t introduce more than one stick height and keep that expectation.
Later, when. you’re introducing dynamics within the pieces, you can talk about and practise different stick heights, e.g.:
p = piano = stick height of 10cm from the bucket
f = forte = stick height of 30cm from the bucket
Students get faster, and out of time with the music.
This happens in every class. It doesn’t matter how old they are, or even if they have been doing bucket drumming for a while. Once they get a simple beat going, and they’re playing together, a little bit of adrenaline kicks in and they start getting faster, and out of time with the music.
The keys to fixing this:
1. Spend enough time miming at the floor. Don’t let the first time they hear the backing music be when they are hitting a bucket. They need to hear it several times, and feel the beat in their body first.
2. Body Percussion Practice. Have them watch the animation, listen to the music and tap their legs in time with the music instead of miming. This way they’re feeling the beat in their body.
3. Bring the volume down. Have them play it once super-quiet! When they concentrate on playing quieter, they naturally concentrate also on playing in time with the beat.
Classroom management feels chaotic
If you’re having to raise your voice at all, then the activity is going to get out of control. You shouldn’t have to yell instructions, and you shouldn’t have to
1. Enrollment
The first step is enrollment. Students need to be enrolled as a group into the idea of being a group of musicians, and they have to be keen! If they’re not, then it will be a challenge. So, talk excitedly about the idea of bucket drumming, well before they get to it! Start weeks before your first lesson talking about the idea of doing it. Show them the buckets, and say “when I think you’re ready, we’re going to get those buckets out and have a bucket drumming class… but only when I know you are all ready to be a great group!”
2. Minimal Instruction at the buckets.
We mentioned this earlier, but it is worth re-iterating again. Instruction happens on the floor, away from the buckets, without sticks in their hands. If you’re trying to teach something and there are 30 kids with sticks in their hands, there will be noise of sticks hitting together, and accidental taps on a bucket. Accidental taps turn into non-accidental taps, students start talking, and then before you know it you’re yelling to get attention.
Once your class knows what they will do, they should silently move to the buckets, you give your “sticks up” signal (non-verbally), and then start the animation. No words are required. Once the animation finishes, you give the “sticks down” signal and then they move to the floor.
3. Use your emotional tool-box.
Your emotions might be the best tool you have!
Start happy and excited: “I’m so excited to see what you can do today with our bucket drumming!”
Give personal praise, particularly when unexpected: “James, I was so happy to see you play that pattern with your sticks controlled”
Use sadness that you didn’t get through what you wanted: “I’m so sad we didn’t get up to pattern 5 today, as we’re only one step away from putting that together into a song. Why didn’t we get there? (They didn’t get there because we had to practice moving quietly to the buckets over and over).
4. Make it a game!
You can give points, and have classes compete with each other, to be the “best bucket drumming crew!” When a class moves perfectly and quietly to the buckets, give them a point. When they have to come back to the floor for misbehaviour, take away a point. They will do anything to not be the student who causes the class to lose a point! This is so much more effective than just yelling to get your point across.
5, Work towards a performance.
There is nothing like the intrinsic motivation of a performance coming up to get students motivated. Even if it is just one class playing to another class, they won’t want the embarrassment of not looking like they know what they are doing! So plan a little performance for the end of the term. Even if you can’t do an actual performance, invite another teacher or guest to come and see them play.
Lesson-by-lesson Progression
Like most of the SING & PLAY materials in the Fun Music Company curriculum programs, we suggest approximately a five lesson unit developing one performance piece.
They develop the necessary skills, learn the required patterns, memorise the sections, and add dynamics. The five lesson sequence for a beginner bucket drumming piece might look something like this:
| Lesson | Lesson content |
|---|---|
| Lesson 1 | Introduction to bucket drumming, learning patterns 1 and 2 |
| Lesson 2 | Revise patterns 1 and 2, call and response section, three sections of the song |
| Lesson 3 | Putting the song together, adding dynamics |
| Lesson 4 | Refinement of performance, dynamics and performance from memory |
| Lesson 5 | Perform the song to teacher or another class, record for assessment |
With a lesson sequence like this, students will have something to achieve, and have the most chance of success. Of course it can be varied from five weeks and done in a shorter or longer period of time, however five weeks is what we have found to be approximately the best time frame.
This lesson sequence structure is similar to how we structure all of the bucket drumming units in our Grade 5 music curriculum and Grade 6 music curriculum programs.
The Fun Music Company Curriculum program contains eight complete bucket drumming pieces, with ALL exercises and lesson plan frameworks set up so that you can walk in and teach it. We also expand on this article with a comprehensive classroom management plan which you can refine and adapt to your school and your students.
Get Started Today with a Free Sample Lesson
We want you to succeed. In bucket drumming, your first lesson needs to be a success.
Therefore, we’ve tried to give you everything possible to make that happen. We’ve made available a special sample pack from our Fun Music Company curriculum program grade 5, where students will work towards learning the first piece, called Funky Buckets.
Your sample pack contains:
- Complete animations to use in the classroom
- A step-by-step getting started guide
- A preview of what it looks like when students are begging to come to music class!

You’ve Got This!
The teachers who get the best results with bucket drumming aren’t necessarily the ones with the most musical experience. They’re the ones who start simple, build slowly, and stay consistent.
If you’re also looking for percussion activities that work well with younger students, or want a warm-up activity to complement your bucket drumming lessons, our Boomwhackers for the Classroom guide is a great place to start — the two instruments work beautifully alongside each other in a well-rounded K–6 program.
Your first lesson doesn’t need to be perfect. It just needs to happen. Use the framework above, download and use your sample lesson with the animation, and then invest in the Fun Music Company complete materials with all animations.
This bucket drumming unit works perfectly as part of a comprehensive music curriculum for upper primary students.
About the Author

Kevin Tuck knows what it’s like to walk into a room full of students holding buckets and sticks for the first time — he’s done it over hundreds of times. As a professional percussionist and co-founder of The Fun Music Company, Kevin has spent 30 years refining how to teach rhythm in real classrooms.
Kevin has a masters degree in music and music education, and ever since he completed it he has enjoyed studying and reading articles on teaching music, and has particularly maintained an interest in different methodologies of teaching rhythm.
His performing and workshops have reached thousands of students across Australia through Musica Viva‘s touring programs. This guide is based on his experience of what actually works when you’re standing in front of 25 excited kids with buckets.
Leave A Comment