There’s so much technology in the classroom information out there it can make your head spin.
But, you don’t have time, the energy or the money to try promising everything to your students under the sun.
You just want to know what works best, apply it to your teaching and get the results you need for your classes.
That’s why today we are going to look at a step by step lesson using the iPad Beat Sequencer. The Beat sequencer tool in Garageband is a fun and easy way to learn how drum beats work and how they are built. It has a grid system to make it easy to understand how to use.
In this lesson you’ll get:
- A “teachers” video tutorial outlining how the resource works
- A classroom screen presentation video showing step by step instructions for the lesson
- A student assessment sheet outlining the tasks required for the lesson and an easy assessment chart for the lesson to mark off once each task is completed.
Want to learn more detail about how to use this Beats Sequencer lesson plan without needing any lesson preparation in 3 easy steps?
Keep reading …
Step #1 : Students will learn to program a basic drum pattern into the beat sequencer tool and learn to record it.
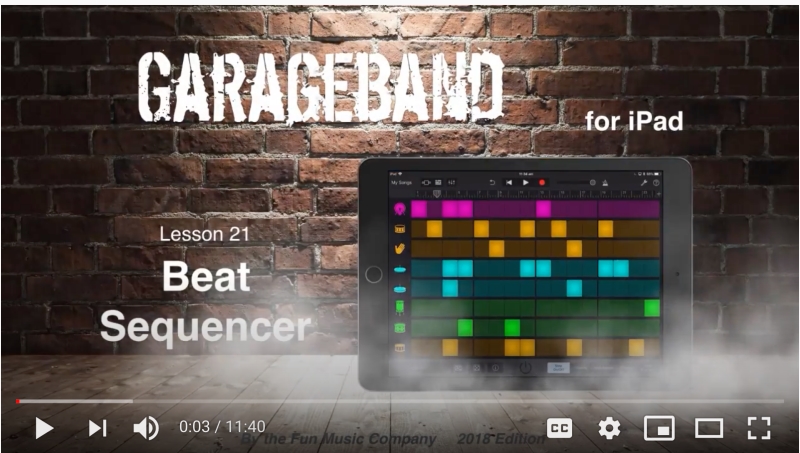
This is the student tutorial Beats Sequencer Video Lesson you can use to learn from or have your students use to do this short 11.40 minute lesson:
Here is what you will find inside the video:
Step #1 : The students will learn to program a basic drum pattern into the beat sequencer tool and learn to record it.
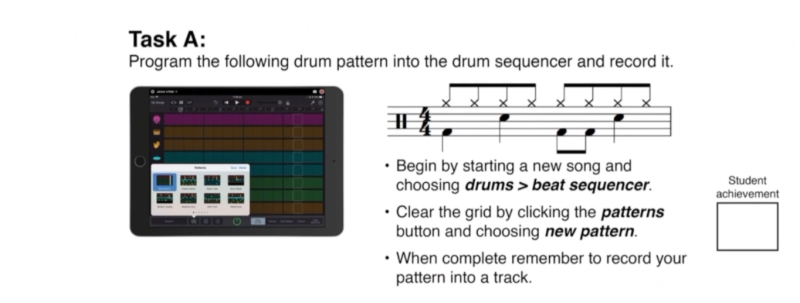
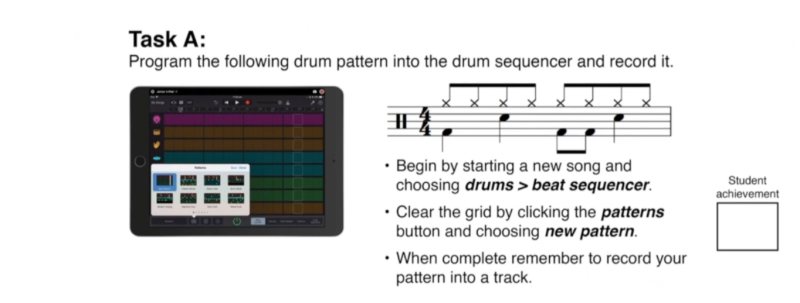
Here is the first assessment task of the lesson the students will learn to do in the lesson:
Students don’t need any prior knowledge of Garageband to complete this lesson and the student video tutorial will guide them through the process of completing this first task step by step in just a few minutes.
- At .30 minutes the student video tutorial starts by running through how to get to the Beat Sequencer in Garageband using the Ipad.
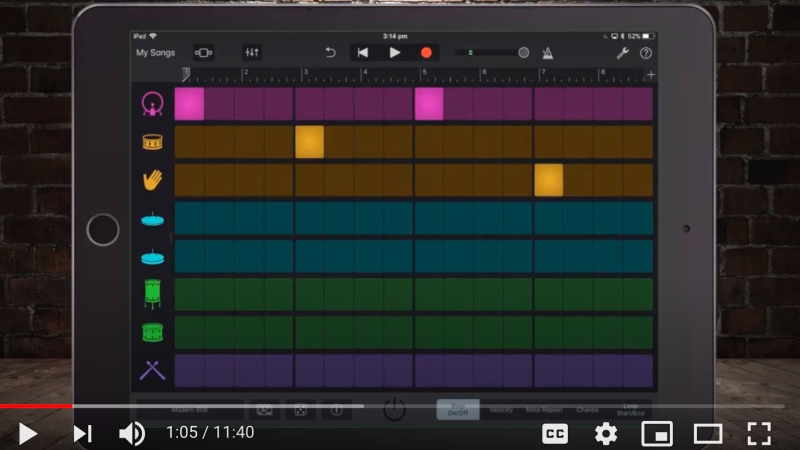
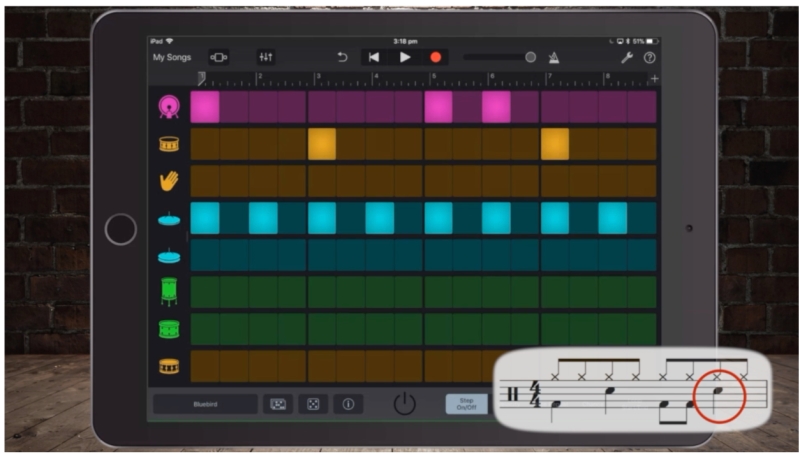
The beat sequencer tool looks like this:
- At .55 minutes, the video shows you how the Beat sequencer looks and how to get to it in Garageband for iPad. This is a 2018 version, but still works perfectly on any iPad as the software for this tool hasn’t changed.
- At 1.21minutes students will discover what all these little buttons at the bottom of the screen are and how they work in the beat sequencer tool :
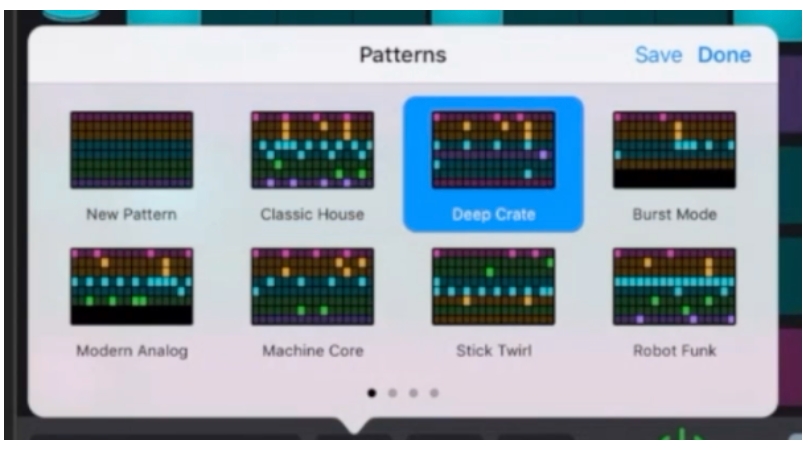
- At 1.35 minutes we look at preset patterns in the beat sequencer tool and how to use them. The beat sequencer preset patterns look like this:
- At 2.05 minutes we look at how to choose a drum kit and how to program a drum pattern into the beat/drum sequencer tool. Here is where we are introduced to the first task of the lesson:
- At 5.09 minutes Students will learn how to make this given drum pattern on the beat sequencer:
- At 5.51 minutes Students learn to record the pattern they have made and have this first assessment task checked by their teacher.
Step #2: Students will expand their pattern into a two bar pattern, with a variation in the second bar.
Here is the second assessment task of the lesson;
- At 6.49 minutes students discover how to make a two bar pattern (instead of the one bar pattern we made in step 1 above)
- At 6.53 minutes students learn to record that new two bar pattern into a new track by finding the “information” button to show pattern settings to extend the sequence we’re creating.
- At 7.40 minutes the slight variations are added to the longer sequence by tapping extra light up squares and experimenting with the sounds.
- At 8.50 minutes task B is complete!
Step #3: Students will create a guitar and bass guitar parts to go with their drum pattern and learn to follow a chord progression using the “smart” tools in Garageband.
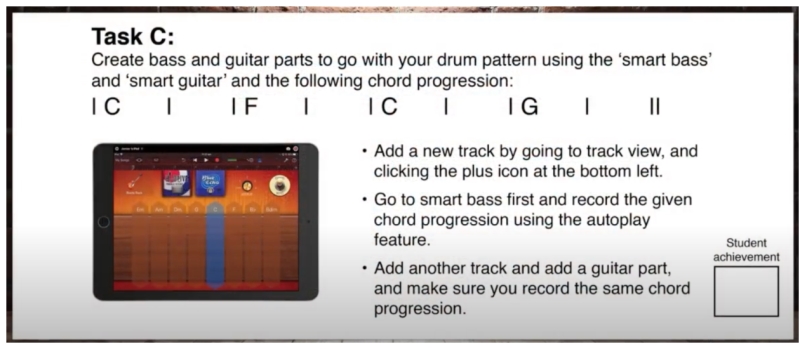
Here is the third assessment task of the lesson:
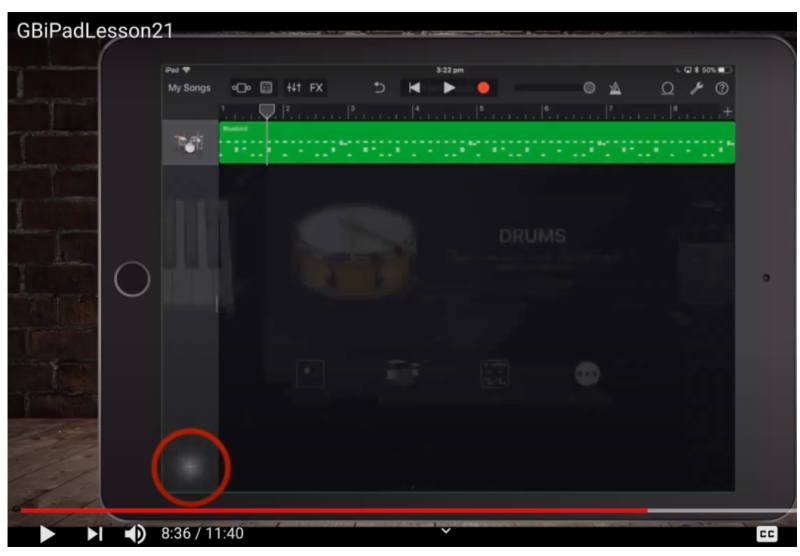
- At 8.34 students learn to go into editing mode and press + icon to add a new track:
Editing mode looks like this and you press the + icon (the big red circle on bottom left of the picture) to add a new track like this picture shows:
- At 8.41 minutes, the students choose Smart Bass to make a bassline for their 2 bar sequence.
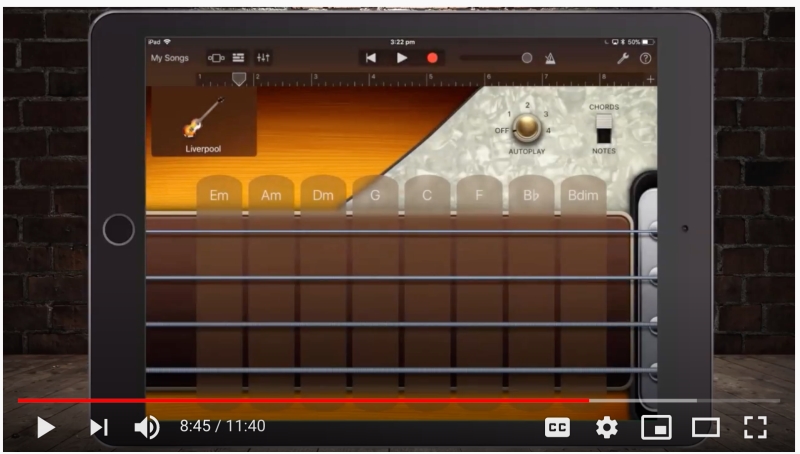
The Smart Bass screen looks like this:
- At 8.54 students choose chords mode and auto play to experiment with choosing a pattern they like.
- At 9.14 students learn to record the given chord progression in the assessment above using the smart bass pattern they have chosen.
- At 9.40 students go back to track mode and record another part- the guitar part, choosing the “smart guitar” instrument.
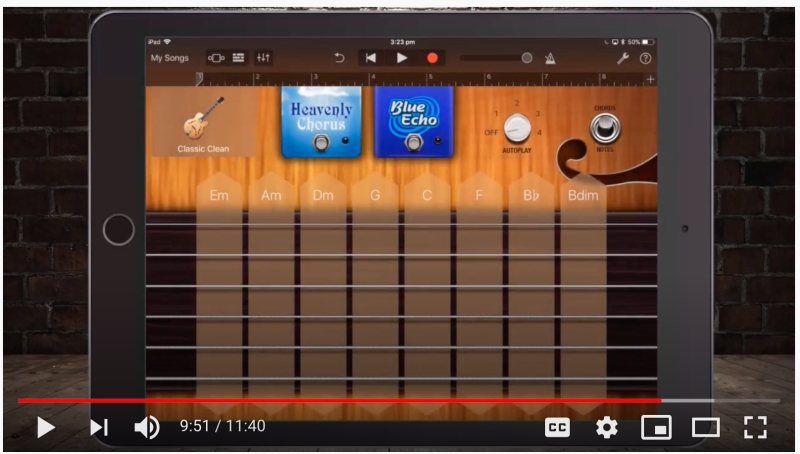
The smart Guitar screen looks like this:
- At 9.56 students again use the Autoplay feature to record a guitar chord progression.
- At 10.40 students record their two bar chord progression.
- At 10.50 students save their work and sign off on task C!
More resources for teaching Garageband using iPads
If you’re serious about teaching Garageband to its full potential and learn more about the different tools that Garageband offers as a learning experience, you might want to join our Composition for Garageband Course, one of our signature programs. It’s all laid out step by step and you don’t even have to do any extra preparation to get it started with your classes. Updates to the course occur whenever a new update has been made to the software.
You can learn more by watching this short video:



Leave A Comment